Easy 5 Minute Farmhouse Style Framed Chalkboard
(Disclosure: This blog post contains affiliate links for your convenience. Please see here for more info on affiliate links).Cost: Under $20.00 (compare the DIY costs to this smaller, more expensive chalkboard)
Time: 5 Minutes for Assembly
Size: 2ft x 4ft, but you can make yours any size you'd like
1) Start by collecting your supplies
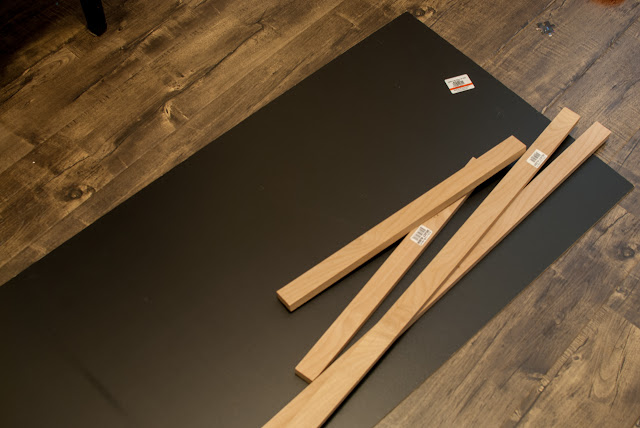
I started by dragging my kids with me to Home Depot. If you've never shopped for a DIY project while dragging little kids along with you, you haven't lived yet. HA! Alright, my girls were actually pretty well behaved that day. They really enjoy going with me to Home Depot (or Lowes) to ride in the race-car carts. Home Depot has pre-made chalkboards in the plywood section for $9.99. This is what I used. They are 2ft x 4ft, and if you want a smaller chalkboard, you can have it cut down to the size you're looking for. I wanted a large chalkboard for my mantle, so the 2ft x 4ft worked well for me.For the frame, I found some Alder board trim. I liked the width of the 0.75" x 1.5". Here's your tip. Because this is sold "by the foot", Home Depot will cut to whatever size you need. I literally didn't even pull out a measuring tape, I just showed the worker what I was wanting to accomplish. I think I may have confused him a little, bless his heart, but he was very accommodating and helpful. At my Home Depot, they will give you 4 free cuts, and after that there is a charge. So if you know what your measurements are, have Home Depot cut for you! Much faster and easier for me to have them cut it instead of dragging out the saw for only a couple of cuts. I have been known to be stubborn and a slight control freak in the past, so having something cut for me kind of stresses me out a little. But, kids. Enough said. My ways have changed! I need it as simple and time saving as possible or the project probably won't get finished.
You will need a gel super glue, or E6000, or really any kind of strong glue will work. I would probably stay away from runny liquid glues, and hot glue probably isn't strong enough to hold this for the long term. I used a gel super glue and it worked perfectly. Now that you have your supplies, it's time to assemble. This will take you less than 5 minutes. It will have taken longer for you to drive to Home Depot and shop for the items than it will for you to complete the chalkboard.
2) Assemble Your Chalkboard
Now that you have everything, the assembly part is pretty fast and easy. Lay out your chalkboard on a hard surface. Be sure to protect the surface by putting something down just in case your glue runs a little. I may or may not have dropped a small dot of super glue on my floor...I got it up fast...but ya...just do as I say, not as I do!Use a thin line of glue on your trim. You don't need very much glue, so less is more. If you put too much it will goop out the sides when you put the trim on. Gently place the trim on the chalkboard and firmly hold in place for a minute or so. You'll want to follow the instructions on whatever glue you're using. Once the glue feels like it has "set", repeat for the rest of the trim pieces.
The glue I used dried quickly, so I was able to use my chalkboard almost immediately! But make sure to allow the proper drying time for the glue you use. After it has dried, make sure to "season" the chalkboard by rubbing a piece of chalk over the entire surface and wiping with a dry paper-towel or dry cloth. And that's it! You're all done.
***A Couple of Notes***
- I didn't stain or paint my trim pieces. I wanted a raw wood look for my chalkboard frame. If you want yours painted or stained, I would probably do that before gluing the trim on the chalkboard. You could do it after, but then you would have to tape down the edges so the paint or stain wouldn't get on the chalkboard. If you're saving time, paint or stain before hand!
- For a super vintage feel, before attaching the trim you could take a hammer or heavy chain and whack the trim pieces a few times to give it a beat-up look on the wood. I kind of wish I had done this and probably will next time (because I have plans to make several more!).
- Don't worry about being perfect! Perfection is so overrated. If your trim piece slips a little while you're attaching it or you end up with some glue gooping out around the edges, it's OK. Assuming your glue dries clear (which I highly recommend!), when you rub chalk to season the board it will cover up the imperfections.
There! Wasn't that easy? No nails or special tools needed. And you saved yourself a bit of money too! What will you use your chalkboard for? Come join our Facebook group and show off pictures of your completed project! I'd love to see them.
You might also enjoy this post about 5 Farmhouse Style Finds


No comments